Automatic React Deployment With AWS CodeBuild and GitHub on S3 Bucket
Isn’t it cool to automate the process of deploying the react web app to AWS S3? AWS offers easy way to automate the whole process, which will automatically build your react app and deploy it to S3. You just need to configure resources once and then all of the deployment part will be handled automatically.
You will need following resources before setting up automatic deployment:
- A GitHub account
- AWS account (better with root access)
- Working React project on your local machine
If you have these, let’s get started:
Configure GitHub to Push Your Code:
- Sign in to your GitHub account and create a new repository. (Or directly visit this link: https://github.com/new )
- Give your repository a name. I have chosen ‘react-codebuild’.

- You can make your repository ‘public’ for now. If you have sensitive data, you can make your repository private (but you will need to login while pushing and pulling your code to GitHub.)
- Then click on ‘Create repository’ and a blank repository will be created.
- Now, on the root directory of react project, execute following commands: (I assume that git client is installed on your machine)
git init
git remote add origin https://github.com/username/react-codebuild.git
git add .
git commit -m 'initial commit'
git branch -M main
git push -u origin main- In the first line, replace username with your GitHub username. You might be asked to enter GitHub credentials. If asked, enter them.
- Go back to GitHub repository and see there if your files are there. If so, then proceed to next steps.
Create S3 Bucket:
- Sign in to AWS console.
- Go to S3 and click on ‘Create Bucket’.
- Type the name for your bucket. I have chosen ‘react-codebuild’.

- Then scroll to bottom and click on ‘Create bucket’.

Create CodeBuild:
- Go to AWS CodeBuild.
- Click on ‘Create build project’.

- Then, enter a name for your your project. I have chosen ‘react-codebuild’.
- On source provider, select ‘GitHub’. Select ‘Connect using OAuth’ and click on ‘Connect to GitHub’.
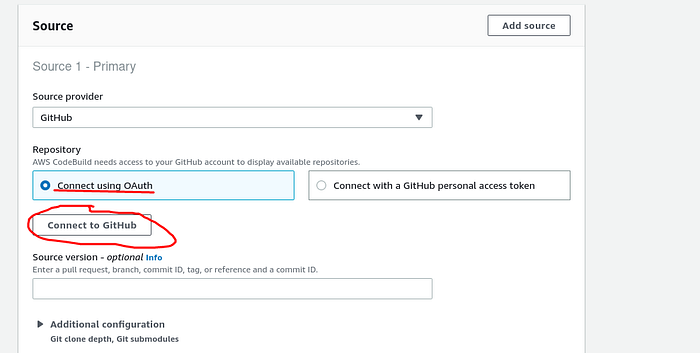
- Then a popup will appear and click on ‘Authorize aws-codesuit’.
- After the successful authorization, popup will close and you will be asked to enter the repository URL.
- In ‘Repository URL’, enter the URL of repository that we had just created.
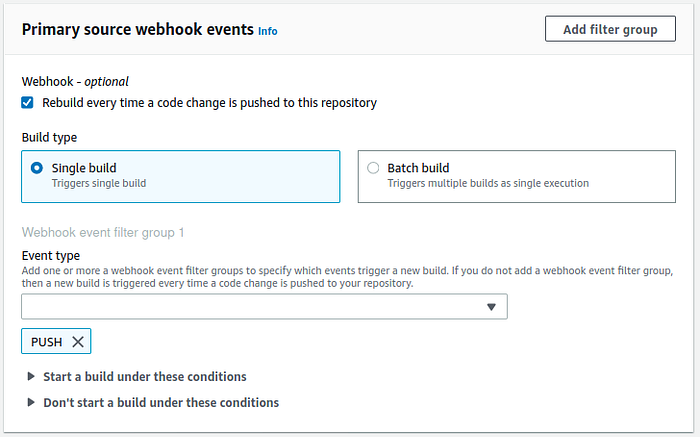
(Looks like: https://github.com/username/react-codebuild) - On Primary source webhook events, select following options:
Build type: Single build
Event type: PUSH
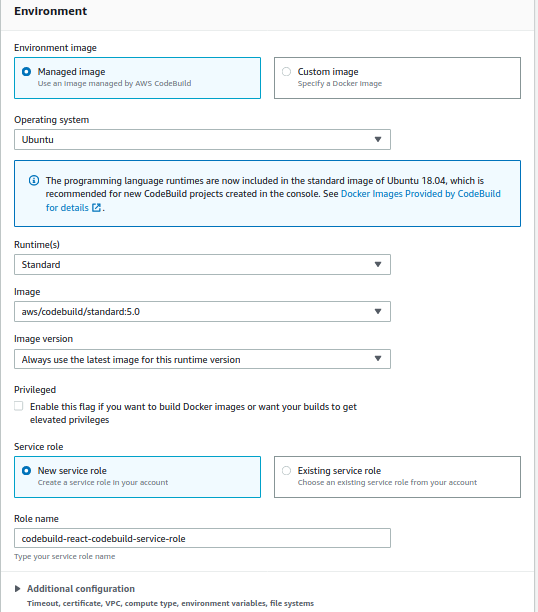
- On Environment, select following options:
Environment image: Managed Image
Operating system: Ubuntu
Runtime(s): Standard
Image: aws/codebuild/standard:5.0
Image version: Always use the latest image for this runtime version
Service role: New service role
Role name: codebuild-react-codebuild-service-role (leave default value)
- On Build specifications: Use a buildspec file

- On Artifacts, select following option:
Type: Amazon S3
Bucket name: react-codebuild (select the bucket you had just created)
Name: /
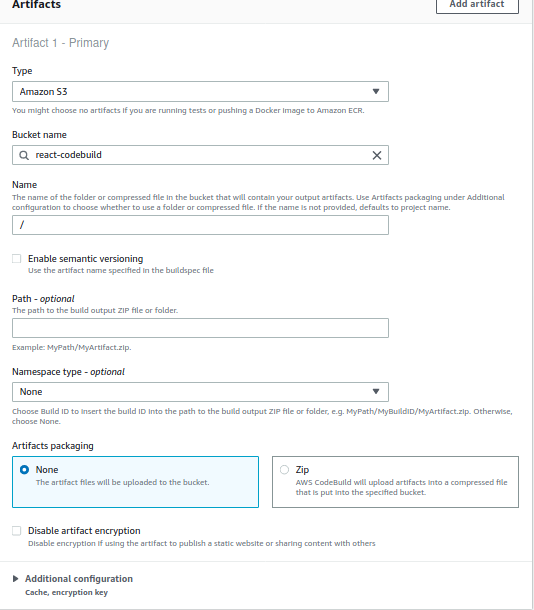
- Finally, click on ‘Create build project’.
Configure React Project:
- In your root directory in react project, create file called ‘buildspec.yml’.
- Paste the following contents in ‘buildspec.yml’ file that you just created.
version: 0.2phases:
  install:
    commands:
      #install Node 12
      - echo installing node
      - curl -sL https://deb.nodesource.com/setup_12.x | bash -
      - apt-get install -y nodejs
      #install yarn
      - echo installing yarn
      - curl -sS https://dl.yarnpkg.com/debian/pubkey.gpg | apt-key add -
      - echo "deb https://dl.yarnpkg.com/debian/ stable main" | tee /etc/apt/sources.list.d/yarn.list
      - apt install --no-install-recommends yarn
  pre_build:
    commands:
      #install dependencies
      - echo installing dependencies
      - yarn
  build:
    commands:
      #build
      - echo building
      - yarn build
artifacts:
  files:
    - "**/*"
  discard-paths: no
  base-directory: build
Note: Make sure that yarn builds project to ‘build’ folder.
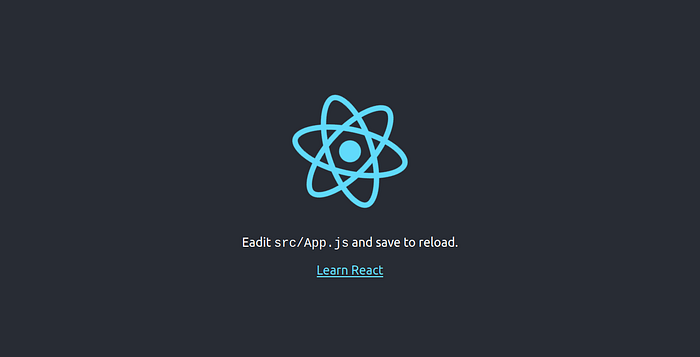
Here is my working react project on localhost:
Deploy React to S3:
- Now you have configured a react project, check if your react projects builds successfully on your local device. If the local build is successful, enter following commands on terminal (or cmd):
git add .
git commit -m 'added buildspec.yml'
git push origin main- Then your code will be pushed to GitHub repository and AWS CodeBuild will start building the project. You can check the project by going to respective CodeBuild.
- If everything goes well, your build files will be pushed to s3 bucket.
Configure S3 to host static files:
- Go to ‘react-codebuild’ bucket.
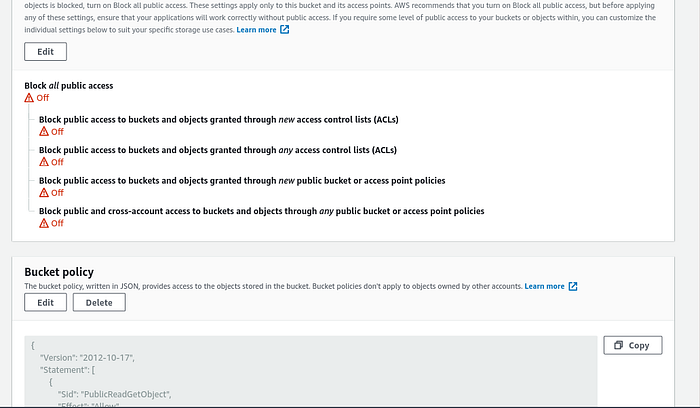
- Head over to the ‘Permissions’ tabs in your bucket and disable ‘Block all public access’.
- Then in same page, edit the bucket policy and paste the following content:
{
    "Version": "2012-10-17",
    "Statement": [
        {
            "Sid": "PublicReadGetObject",
            "Effect": "Allow",
            "Principal": "*",
            "Action": "s3:GetObject",
            "Resource": "arn:aws:s3:::react-codebuild/*"
        }
    ]
}
Note: Replace ‘react-codebuild’ in above code with your bucket name.
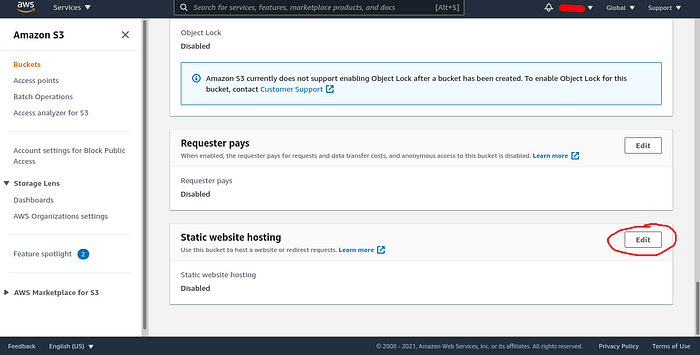
- Now, go to ‘Properties’ tab and scroll to the bottom and on ‘Static website hosting’, click ‘Edit’.
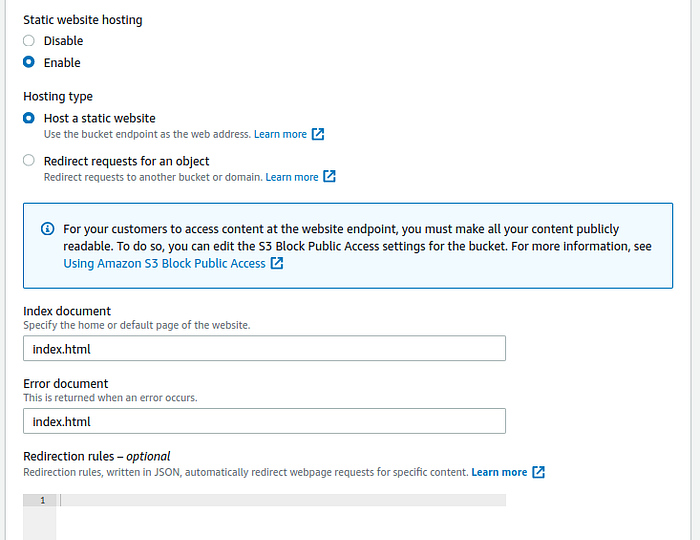
- Enable static website hosting and fill out ‘index.html’ for both ‘Index document’ and ‘Error document’ fields. Then save your changes.
- Now you will see a link towards the bottom on same page. Click on that link and you will see your website being hosted.
Now, anytime you push the changes on your project on the GitHub, it will automatically rebuild the project and serve updated website.
Congratulations, you have successfully setup automatic deployment of react app with AWS CodeBuild and GitHub.
Going to next steps, you can try out following:
Integrating CloudFront and custom domain with S3 bucket